
Welcome! This manual guides you through safe operation and maintenance of your DR Trimmer Mower, ensuring optimal performance and longevity.
Understanding Your DR Trimmer Mower
Your DR Trimmer Mower is designed for residential lawn care, offering a range of models like the PILOT, PREMIER, PRO, and PRO XL/XLSP. These mowers utilize either manual start or electric start engines, with options including Briggs & Stratton power.
The PRO model boasts a DR OHV engine delivering 9.7 ft-lbs of power, exceeding the PILOT and PREMIER models. DR also offers PULSE 62V electric mowers. Key components include the cutting deck, blade, engine, drive system (if self-propelled), and height adjustment mechanism.
Familiarize yourself with these parts and their functions. Understanding your mower’s specific model and features, as detailed in this manual, will ensure efficient and safe operation. Regularly checking in-stock inventory is recommended.
Safety Precautions
Prioritize safety! Always disconnect the spark plug wire before any maintenance, like blade work. Wear appropriate safety glasses and sturdy footwear during operation and servicing. Keep children and pets clear of the mowing area.
Never operate the mower with damaged parts. Inspect the blade for sharpness and balance before each use. Avoid mowing on wet or slippery surfaces to prevent loss of control. Be mindful of bystanders and obstacles.
Do not modify the mower or use non-approved attachments. Ensure adequate ventilation when checking or changing the oil. Refer to the full manual for comprehensive safety guidelines and warnings. Following these precautions will minimize risk and ensure a safe mowing experience.
Assembly and Setup
Prepare for mowing! This section details unboxing, parts identification, handle attachment, and cutting height adjustments for your DR Trimmer Mower.
Unboxing and Parts Identification
Carefully unpack your new DR Trimmer Mower! Begin by inspecting the carton for any shipping damage. Once opened, verify all listed components are present. These typically include the mower deck, handle, wheels, discharge chute, operator’s manual, and hardware kit containing bolts, nuts, and washers.
Identify each part using the parts diagram within this manual. Pay close attention to the different wheel sizes and handle components. The hardware kit is crucial; organize the bolts and washers for easy access during assembly. Missing parts? Contact DR Power Equipment customer support immediately, referencing your model number (e.g., T4X1070DMN, TR45187BEN) for swift resolution. Proper identification prevents frustration and ensures a smooth setup process.
Attaching the Handle
Securely fasten the handle to the mower deck using the provided bolts and washers from the hardware kit. Align the handle with the designated mounting points on the mower chassis. Ensure proper orientation – the handle typically curves towards the operator for ergonomic control.
Tighten the bolts firmly, but avoid over-tightening, which could damage the mounting points. Double-check that the handle is stable and doesn’t wobble. A secure handle is vital for safe and comfortable operation. Refer to the diagram in the manual for correct bolt placement. Once attached, verify the handle’s locking mechanism (if equipped) engages properly. A properly installed handle enhances maneuverability and control during mowing.
Adjusting Cutting Height
Locate the height adjustment levers, typically found near each wheel of the DR Trimmer Mower. These levers control the position of the wheels relative to the mower deck, thus changing the cutting height. The mower likely offers multiple height settings, ranging from higher for longer grass to lower for a manicured finish.
To raise the cutting height, move the levers to a higher notch. To lower it, move them to a lower notch. Ensure all four wheels are adjusted to the same height for an even cut. Test the setting on a small patch of grass and adjust as needed. Regularly check the height settings, as bumps or uneven terrain can sometimes dislodge the levers.
Operating Instructions
Before starting, ensure the mower deck is clear and the area is free of obstacles. Familiarize yourself with all controls for safe and efficient mowing.
Starting the Engine (Manual Start)
Preparing to Start: Ensure the fuel shut-off valve is open and the throttle is set to the ‘choke’ position. Prime the engine by pressing the primer bulb several times until fuel is visible. Slowly pull the starter rope with a firm, steady motion. Avoid jerking the rope, as this can damage the starter mechanism.
Initial Pulls: The engine may require multiple pulls to start, especially when cold. Once the engine sputters or attempts to run, gradually move the throttle to the ‘run’ position. Continue pulling until the engine starts and runs smoothly. If the engine fails to start after several attempts, consult the troubleshooting section of this manual.
Important Note: Always hold the operator presence control (OPC) lever firmly against the handle during starting and operation. Never start the mower with wet hands or while standing in wet conditions.
Starting the Engine (Electric Start ౼ if applicable)
Pre-Start Check: Verify the battery is fully charged and securely connected. Ensure the ignition switch is in the ‘off’ position before inserting the key. Confirm the operator presence control (OPC) lever is engaged. The electric start feature offers convenient, push-button starting.
Starting Procedure: Insert the key into the ignition switch and turn it to the ‘start’ position. Hold the key until the engine starts. Release the key immediately once the engine is running. Do not hold the key in the ‘start’ position for extended periods, as this can damage the starter motor.
If No Start: If the engine doesn’t start, check the battery connection and charge level. Consult the troubleshooting section for further assistance.
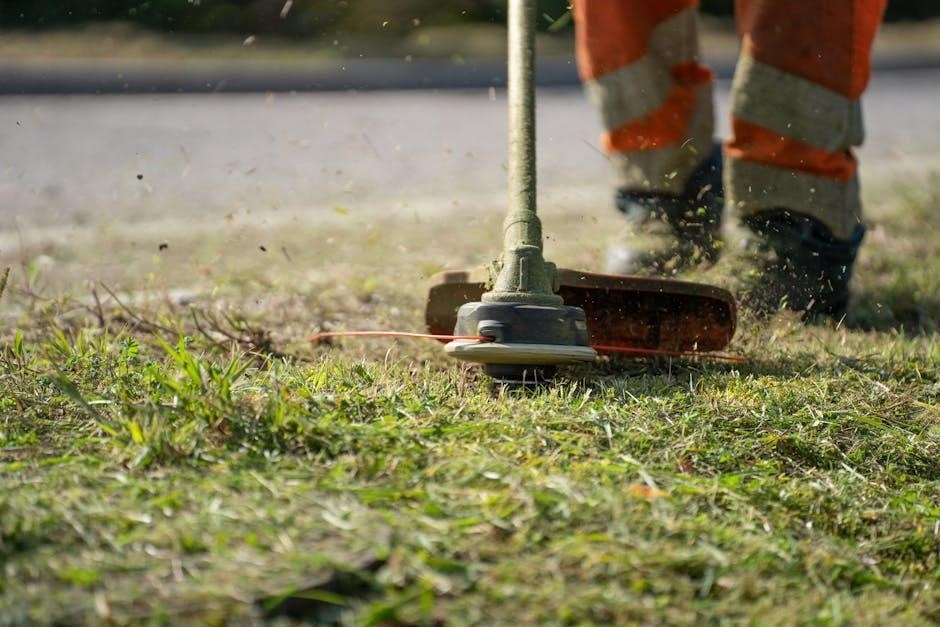
Mowing Techniques
Optimal Cutting: For the best results, mow when the grass is dry. Overlapping each pass by a few inches ensures a clean, even cut. Avoid cutting more than one-third of the grass blade length at a time to prevent stressing the lawn.
Terrain Considerations: When mowing slopes, always mow across the slope, not up and down, for increased stability. Reduce speed on uneven terrain. Be mindful of obstacles like rocks and roots, and adjust mowing speed accordingly.
Discharge & Mulching: Utilize the discharge chute for standard mowing, or engage the mulching function (if equipped) for finer clippings that return nutrients to the soil. Regularly clear the discharge chute to prevent clogging.
Self-Propelled Drive Operation (if applicable)
Engaging the Drive: Your PRO XLSP model features self-propulsion. Engage the drive lever located on the handle to activate the wheels. Adjust the speed control to match your walking pace and terrain conditions. Slower speeds are ideal for thick grass or slopes.
Drive Control: The variable speed control allows for precise adjustments. Practice using the control to become familiar with its responsiveness. Releasing the drive lever disengages the wheels, allowing for manual maneuvering.

Turning & Maneuvering: For tight turns, slightly lift the front wheels while maintaining drive engagement. Always disengage the drive before reversing or making sharp turns to prevent damage.

Maintenance
Regular upkeep is crucial for peak performance. This section details essential procedures – oil checks, filter cleaning, and blade care – for longevity.
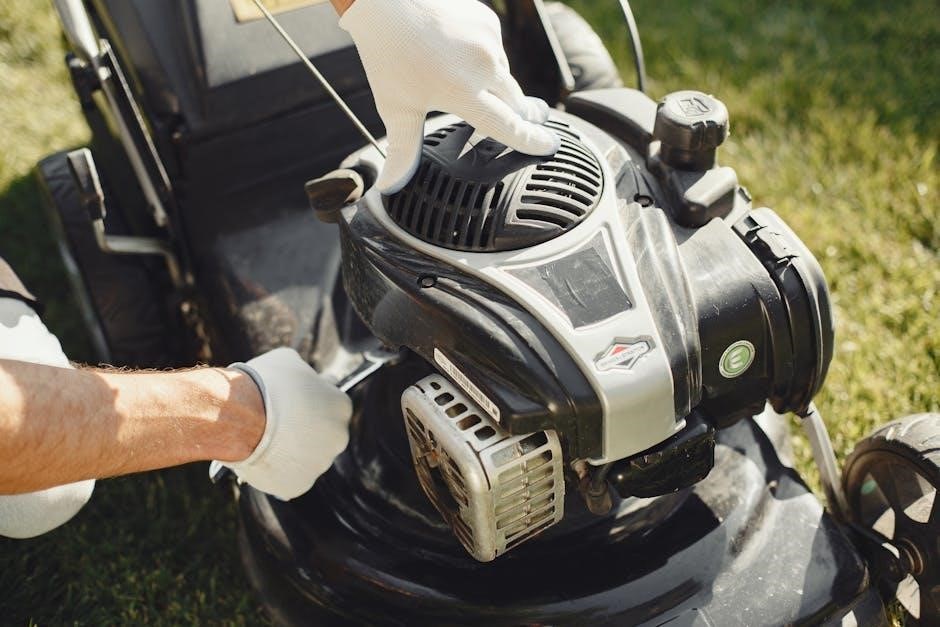
Checking and Changing the Oil
Maintaining proper oil levels is paramount for engine health and longevity. Check the oil level before each use, ensuring it falls within the ‘full’ range indicated on the dipstick. Low oil can cause severe engine damage.
To change the oil, run the engine briefly to warm the oil, making it flow more easily. Then, carefully drain the old oil into an approved container – never dispose of oil improperly. Replace the oil filter simultaneously for optimal results.
Refer to your specific model’s specifications for the correct oil type and capacity. After refilling with fresh oil, double-check the dipstick and securely tighten the oil fill cap. Regular oil changes, typically every 25-50 hours of operation, will significantly extend the life of your DR Trimmer Mower’s engine.
Air Filter Cleaning/Replacement
A clean air filter is crucial for efficient engine operation and preventing damage. Regularly inspect the air filter – ideally before each use – for dirt and debris accumulation. A clogged filter restricts airflow, reducing power and increasing fuel consumption.
For foam filters, gently wash in warm, soapy water, rinse thoroughly, and allow to dry completely before re-oiling lightly with air filter oil. For paper filters, tap gently to dislodge loose dirt; avoid washing.
Replace the air filter when it becomes excessively dirty or damaged, typically every 25-50 hours of use. Refer to your model’s parts diagram for the correct filter type. A clean air filter ensures optimal engine performance and extends the life of your DR Trimmer Mower.
Spark Plug Inspection/Replacement
Regular spark plug inspection is vital for reliable engine starting and performance. Inspect the spark plug every 50-100 hours of operation, or annually. Disconnect the spark plug wire before inspection to prevent accidental starting.
Check for fouling, wear, or damage to the electrode. A properly functioning spark plug should have a clean, light tan or gray color. Clean a fouled plug with a wire brush, or gap it to the manufacturer’s specification (refer to your owner’s manual).
Replace the spark plug if it’s cracked, excessively worn, or cannot be cleaned effectively. Use only the recommended spark plug type for your DR Trimmer Mower model. A new spark plug ensures optimal ignition and engine efficiency.
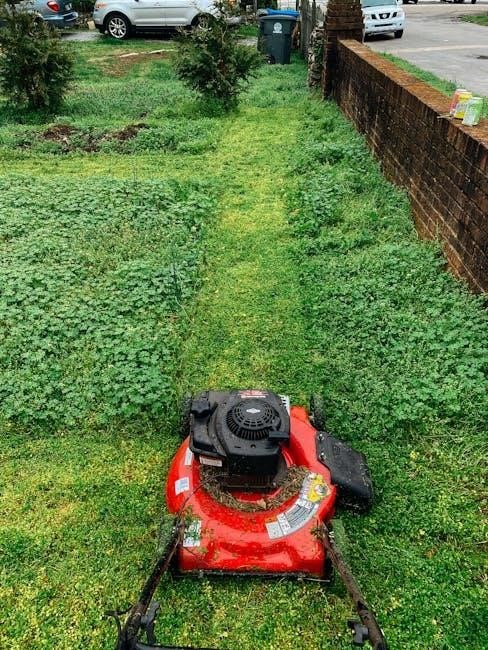
Blade Sharpening and Replacement
Maintaining a sharp blade is crucial for a clean cut and healthy lawn. Regularly inspect the blade for dullness, nicks, or damage. Never operate the mower with a damaged blade!
Sharpening can be done with a metal file or a bench grinder, ensuring to maintain the original blade angle. If the blade is severely damaged or worn, it must be replaced. Always disconnect the spark plug wire before working on the blade.
When replacing, use only an approved replacement blade for your DR Trimmer Mower model. Securely tighten the blade bolt to the manufacturer’s specified torque. A properly sharpened or replaced blade ensures efficient mowing and extends the life of your mower.

Troubleshooting
Facing issues? This section offers solutions for common problems like starting difficulties, uneven cuts, or excessive vibration, ensuring smooth operation.
Engine Won’t Start
Possible Causes & Solutions: If your DR Trimmer Mower engine fails to start, first check the fuel level and ensure the fuel shut-off valve is open. Verify the spark plug wire is securely connected and the spark plug itself is clean and properly gapped. A fouled spark plug will prevent ignition.
Next, examine the air filter; a clogged filter restricts airflow. For manual start models, confirm the choke is engaged correctly during cold starts, and gradually disengage it as the engine warms. If equipped with electric start, check the battery charge and connections. Ensure the safety bail is fully engaged during starting attempts. If problems persist, consult a qualified service technician.
Mower Doesn’t Cut Evenly
Troubleshooting Uneven Cuts: An uneven cut often indicates an issue with the mower blade. First, stop the engine and disconnect the spark plug wire for safety. Inspect the blade for dullness, damage (nicks, bends), or uneven wear. A dull blade tears grass instead of cutting cleanly. Sharpen or replace the blade as needed, ensuring proper balance to prevent vibration.
Also, check the deck for buildup of grass clippings, which can obstruct airflow and affect cutting performance. Adjusting the cutting height to a higher setting can sometimes resolve minor unevenness. Ensure the tires are properly inflated for consistent deck leveling. If the problem continues, a professional inspection is recommended.
Excessive Vibration
Addressing Excessive Vibration: Significant vibration during operation signals a potential problem requiring immediate attention. Immediately stop the engine and disconnect the spark plug wire. Inspect the mower blade – an unbalanced blade is a common cause. Ensure it’s securely attached and properly sharpened. Check for any debris lodged under the deck, as this can contribute to imbalance.
Examine the engine mounting bolts to confirm they are tightened to the manufacturer’s specifications. Loose bolts can amplify vibrations. If the vibration persists after these checks, the engine itself may have internal issues, necessitating professional service. Continued operation with excessive vibration can cause further damage.
DR Trimmer Mower Models
Explore the DR lineup! Options include PILOT, PREMIER, PRO, PRO XL, PRO XLSP, and PULSE 62V models, offering varied features and power.
PILOT 22 in. DR Push Mower
The PILOT 22” DR Push Mower represents a fantastic entry point into the DR Power Equipment family. Designed for smaller lawns and those preferring a manual push mower experience, it delivers reliable cutting performance. This model features a durable 22-inch cutting deck, ideal for navigating around obstacles and achieving a clean finish.
Powered by a dependable engine, the PILOT offers sufficient power for typical residential lawns. Its straightforward design prioritizes ease of use, making it suitable for a wide range of users. While lacking self-propelled functionality, the PILOT’s lightweight construction ensures manageable maneuverability. Regular maintenance, as outlined in this manual, will maximize its lifespan and efficiency. Expect a consistent cut and dependable operation from this value-driven DR mower.
PREMIER 22 in. DR Push Mower
The PREMIER 22” DR Push Mower builds upon the foundation of the PILOT model, offering enhanced features for a more refined mowing experience. Still a push mower, it provides a step up in durability and cutting capability. The 22-inch deck remains a versatile size for most residential lawns, allowing for efficient maneuvering.
This model typically incorporates a more robust engine compared to the PILOT, delivering increased power for tackling thicker grass and challenging terrain. While still requiring manual propulsion, the PREMIER’s design focuses on operator comfort and ease of use. Consistent maintenance, detailed within this manual, is crucial for optimal performance. Expect a reliable and efficient cut, making the PREMIER a solid choice for homeowners seeking a dependable push mower.
PRO 22 in. DR Push Mower
The PRO 22” DR Push Mower represents a significant power upgrade within the DR trimmer mower lineup. Featuring a DR OHV engine generating 9.7 ft-lbs of torque, it excels at handling tougher mowing conditions compared to the PILOT and PREMIER models. This increased power makes it ideal for lawns with dense grass, weeds, or uneven terrain.
Despite being a push mower, the PRO’s enhanced engine provides a noticeable difference in cutting performance and overall efficiency. The 22-inch deck offers a good balance between maneuverability and coverage area. Regular maintenance, as outlined in this manual, is vital to maintain this power and ensure long-term reliability. The PRO model delivers a robust and capable mowing solution for demanding homeowners.
PRO XL & PRO XLSP Models
The PRO XL and PRO XLSP represent DR’s premium 22-inch push and self-propelled mower offerings. Building upon the PRO model’s foundation, these versions boast enhanced features for increased convenience and performance. The PRO XLSP, specifically, incorporates a self-propelled drive system, reducing operator fatigue on larger properties or hilly terrain.
Both models share the powerful DR OHV engine, delivering 9.7 ft-lbs of torque. The XL designation often indicates upgraded components or a more refined build quality. Proper maintenance, detailed within this manual, is crucial for maximizing the lifespan and efficiency of these advanced mowers. Owners should pay particular attention to blade maintenance and engine upkeep to ensure optimal cutting and reliable operation.

Warranty Information
DR Power Equipment stands behind its products with a comprehensive warranty program, designed to provide peace of mind to our customers. Specific warranty terms vary depending on the model – PILOT, PREMIER, PRO, or PRO XL/XLSP – and the date of purchase. Generally, DR mowers are covered against defects in materials and workmanship for a defined period, typically ranging from one to five years.
This warranty covers parts and labor for repairs performed by authorized DR service centers. It’s crucial to register your mower promptly after purchase to activate warranty coverage. Please retain your proof of purchase, as it’s required for all warranty claims. Certain components, like wear items, may have limited warranty coverage. Refer to the separate warranty document included with your mower for complete details and exclusions.